Showing posts with label Food. Show all posts

Thursday, October 2, 2014

Easy Mini Pot Pies


Boo and I both like pot pies; the guys don't. So, on a night that I'm making fish for the guys, I'll make Boo and I something we like and they don't. Last week it was Mini Pot Pies.

I debated on the crust. Traditional, frozen pot pies are made with actual pie crust. When we went to the store to look at our crust options, I decided to try pizza crust.


Ingredients:

1 roll refrigerated thin crust pizza dough

1 can creamy chicken soup (not concentrated)

Muffin pan


Directions:
Preheat oven to 400 degrees

Spray 6 cups of your muffin tin with non-stick spray

Open pizza crust, roll out, and cut into 6 pieces. Then cut each piece into two, making one a little bigger than the other.


Place the larger pieces of crust into each of the 6 muffin cups.

Bake for about 10 minutes, or however long your crust instructions say to pre-bake.

Fill each up with soup, then top with smaller piece of crust, sealing as much as you can.


Bake for another 10-15 minutes, until top is golden and inside is heated through.


Boo liked these and my mom and brother both tried them and liked them. I probably would have loved them if I used a different soup. The Banquet soup had celery in it, which is fine for other occasions, but not for pot pies in my opinion. Progresso makes a Chicken Pot Pie soup that is very good, and probably would have worked perfectly for this recipe.

Friday, June 20, 2014

The "Secret" Sauce - Pork Buffalo-BBQ

Bob concocted a wonderful sauce to put on chicken wings. He HAD to make it (by order of the family) whenever we had chicken wings.

My kids loved the pulled pork BBQ made with Coke and BBQ sauce that I used to make at least once a month (recipe here).

One day, Clone of Bob suggested that Bob make HIS sauce for the pork BBQ. Up until that point, he only made it for chicken wings. Well, let's just say that I do not make it with BBQ sauce and Coke anymore...the kids wouldn't hear of it!

So, here's a sort of, kind of recipe...I have no exact measurements since we toss it all in until it tastes good.
 Bob's Secret Sauce Ingredients (Plus a half a stick of butter or margarine)
What you need:
  • 1/2 Stick of margarine or butter
  • Honey
  • Plain ol' BBQ sauce
  • Buffalo wing sauce
What you do:
  • In a saucepan, melt margarine or butter over low heat.
  • Add BBQ sauce (approx. 1/2 to 1 Cup)
  • Add honey (approx 3 Tbsp.?)
  • Add buffalo wing sauce (approx. 2 Tbsp.?)
  • Keep adding the last 3 ingredients until it tastes good to you. It should be slightly sweet with a bit of bite (or more if you like it hot).
Bobs Secret Sauce for Pork BBQ and Other Things

What to put it on:
  • Shredded Pork: I cook a boneless pork roast (about 1- 1 1/2 lbs.) for a few hours on low. No seasoning, no added water. Then I let it cool and shred.
  • Chicken Wings: We like to grill them until a little crispy then coat with the sauce.
  • Anything else you can think of!


Wednesday, June 18, 2014

Ham and Cheese Breakfast Bake

Ham, Cheese, Egg, & Potatoes

I was searching for recipes that used ham, cheese, potatoes, and eggs and really couldn't find anything. Some used ham and potatoes, some used ham and eggs; not potatoes and eggs all at once. So, I decided to come up with something myself.

I'll admit that there is probably a recipe similar to this out there, but I couldn't find it.

Ingredients:
  • 1 Cup Shredded Cheddar Cheese (this is approximate...you could use more or less)
  • 2 Whole Eggs
  • 2 Egg Whites
  • Dash of Milk
  • 8 oz. Package of diced ham
  • 3-5 Potatoes (diced and cooked...not fully cooked, but just cooked, like for potato salad)
Directions:

Preparation:
  1. Preheat oven to 375 degrees
  2. Spray an 8x11" baking dish with cooking spray
Building the Dish:
  1. Put potatoes in bottom of baking dish
  2. Spread ham over top of potatoes
  3. Sprinkle a light layer of cheese over that.
  4. In a separate bowl, scramble together eggs, egg whites, and milk. Add pepper, if desired.
  5. Pour evenly over potatoes, cheese, and ham.
  6. Top with more cheese.
Baking:
  1. Cover top with aluminum foil
  2. Bake covered for 30 minutes
  3. Remove foil and bake for another 15 minutes
  4. Remove from oven and allow to sit for 10 minutes.
  5. Slice and enjoy!
  6. Makes about 8 servings.
I made this on Sunday, but waited to post the recipe because I wanted to see how well this dish reheated in the microwave. I have to say that it didn't taste any different than it did freshly baked. I heated it for 1 minute and it was heated through and still very tasty!


Thursday, January 2, 2014

Breakfast Quesadillas

Yes, I'm obsessed with quesadillas, and with breakfast. I try to find inexpensive ways to have a healthy breakfast; things I can make ahead of time and reheat later.

I started with two whole eggs and two egg whites, mixed with a little bit of milk, salt, and pepper.

Then, to make six quesadillas, I cooked 6 egg omelet-type things; cooking until done on both sides.


At the same time, I cooked a package of Banquet Brown-n-Serve sausage links.

Then, I sliced the sausages in half, and placed those, the egg, and some Mexican blend cheese onto a tortilla shell.

Then I folded them over and cooked them on my indoor grill for 5 minutes.

These turned out pretty good. I was able to freeze and reheat them in the microwave, and they were almost as good as freshly made quesadillas.

Friday, December 20, 2013

Experimenting: Chocolate Peanut Butter Brownie Cupcakes


The other day, when we went grocery shopping, I got a good deal on Betty Crocker Fudge Brownie mix. I decided to look and see if they could be made in a cupcake pan because I really don't like to cut brownies. I've never mastered the art. I found the instructions on Betty Crocker's Website and I was thrilled with the results! I have vowed never to make another "pan" of brownies if I can avoid it.

So now to dress it up. I'm sure you've heard of Slutty Brownies where it's a layer of cookie, a layer of Oreo's (or Reese's Peanut Butter Cups), and then a layer of brownie mix. They are very good, but I had no cookies or candy on hand. I decided to try making a peanut butter cookie and bake it inside of the brownie cupcakes and see how it came out.

Ingredients:
Step 1: Mix both the cookie recipe and the brownie mix separately. For the cookies I used 1/2 crunchy peanut butter and 1/2 creamy. This was only because we were low on creamy peanut butter. I skipped the sea salt.

Step 2: Grease the bottoms of 18 cupcake tins (discussion on cupcake liners below).

Step 3: Put about 2 tablespoons of brownie batter in each of the 18 cups.

Step 4: Roll peanut butter dough as you would for cookies, then flatten them in your hands and put them on top of the brownie mix.

Step 5: Top cookie dough with remaining brownie mix. You will need to be careful with your brownie batter to make sure you have enough for all 18 cups. I had to steal some batter from some of the more full cups to finish off the last two. You will have some cookie dough left, so plan on baking those next (I had enough dough for 12)

Step 6: Bake at 350 degrees for 20 minutes, or until done (mine took 22 minutes).

Cupcake liners: The first batch of plain brownie cupcakes I made, I used cupcake liners. The brownies were sticking to the liners. So, for this recipe, I skipped the liners and the cupcakes stuck to the pan, even though I greased them. So, it's up to you which way you go.

These turned out okay, although I think they would have been better with a Reese's Cup inside... :) I'll probably make them again in the future...and having bonus peanut butter cookies is a plus.

Tuesday, August 13, 2013

Improved Quesadillas!

Back in January, I posted Easy Dinner Recipes, which included a recipe for Easy Quesadillas. I'll admit, that they're easy and they're good, but kind of bland. My father-in-law called me a couple of months ago and suggested using my indoor grill to make quesadillas. Around the same time, I found a recipe for Homemade Taco Seasoning, which tastes much better than the store-bought stuff. I made chicken quesadillas using the Homemade Taco Seasoning and my indoor gill; what an improvement!!

Ingredients:
  • 1 lb. cooked, boneless, skinless chicken; shredded
  • Taco seasoning (homemade or store bought)
  • About 1 cup (or so) shredded cheddar cheese (or a Mexican blend)
  • 5 large flour tortillas
  • Indoor grill
  • Garnishments: sour cream and/or taco sauce

Instructions:

Step 1: in a pan, add chicken and taco seasoning and cook according to package directions.

Please excuse my pics, I used my phone again, ARGH!

Then on half of a flour tortilla, add meat and desired amount of cheese:

Fold over, cook on preheated indoor grill for 5 minutes:

Then, using a pizza slicer, cut each into halves or thirds:

Serve with desired toppings and enjoy!!

You could always cook up the meat and keep the ingredients in the fridge and have them handy for a quick lunch. You may want to preheat the meat in the microwave, or cook them on the grill for a couple of minutes longer.

Tuesday, July 30, 2013

Cookie Fail!

The kids had begged me for two weeks to buy some wild cherry jelly they saw at Walmart.

Boo tried it when I finally gave in and declared that it tastes exactly like cherry JELL-O. This would be good if JELL-O tasted good on toast or sandwiches, but it doesn't.

At a loss what to do with the stuff, other than throw it away because it won't get eaten, my mother-in-law suggested I try baking with it. I love jam thumbprint cookies and figured that cherry would be just as good as the raspberry that I usually use.

I looked at the recipe in my favorite cookbook, and realized that it required butter, not margarine; I had no butter in the house. So, I went searching online for a recipe that I could use margarine in. I found one where someone had commented that they used margarine instead of butter and the cookies turned out great; I decided to give it a try.

I looked over the recipe a couple of times, and when I was finished mixing it up, I rechecked the recipe to make sure that I had put everything in it. This is what I got when I baked them:


I wish I had taken a pic while they were still on the pan. They looked like fried eggs with pink middles instead of yellow. This pic is the result of trying to get them off the baking sheet.

I was not about to let the cookie dough go to waste, so I added 1/2 tsp. of baking powder (aha! the missing ingredient) and 1/4 cup of flour and mixed the dough again. The second pan of cookies was much better!

The moral?? Check the ingredients; if something seems off, it probably is. It's very rare that I bake a cookie that doesn't require either baking soda or baking powder...

I was going to post a link to the recipe here, but I'm reluctant to bash someone else's work. It's also entirely possible that I missed something when writing it down.

Thursday, March 7, 2013

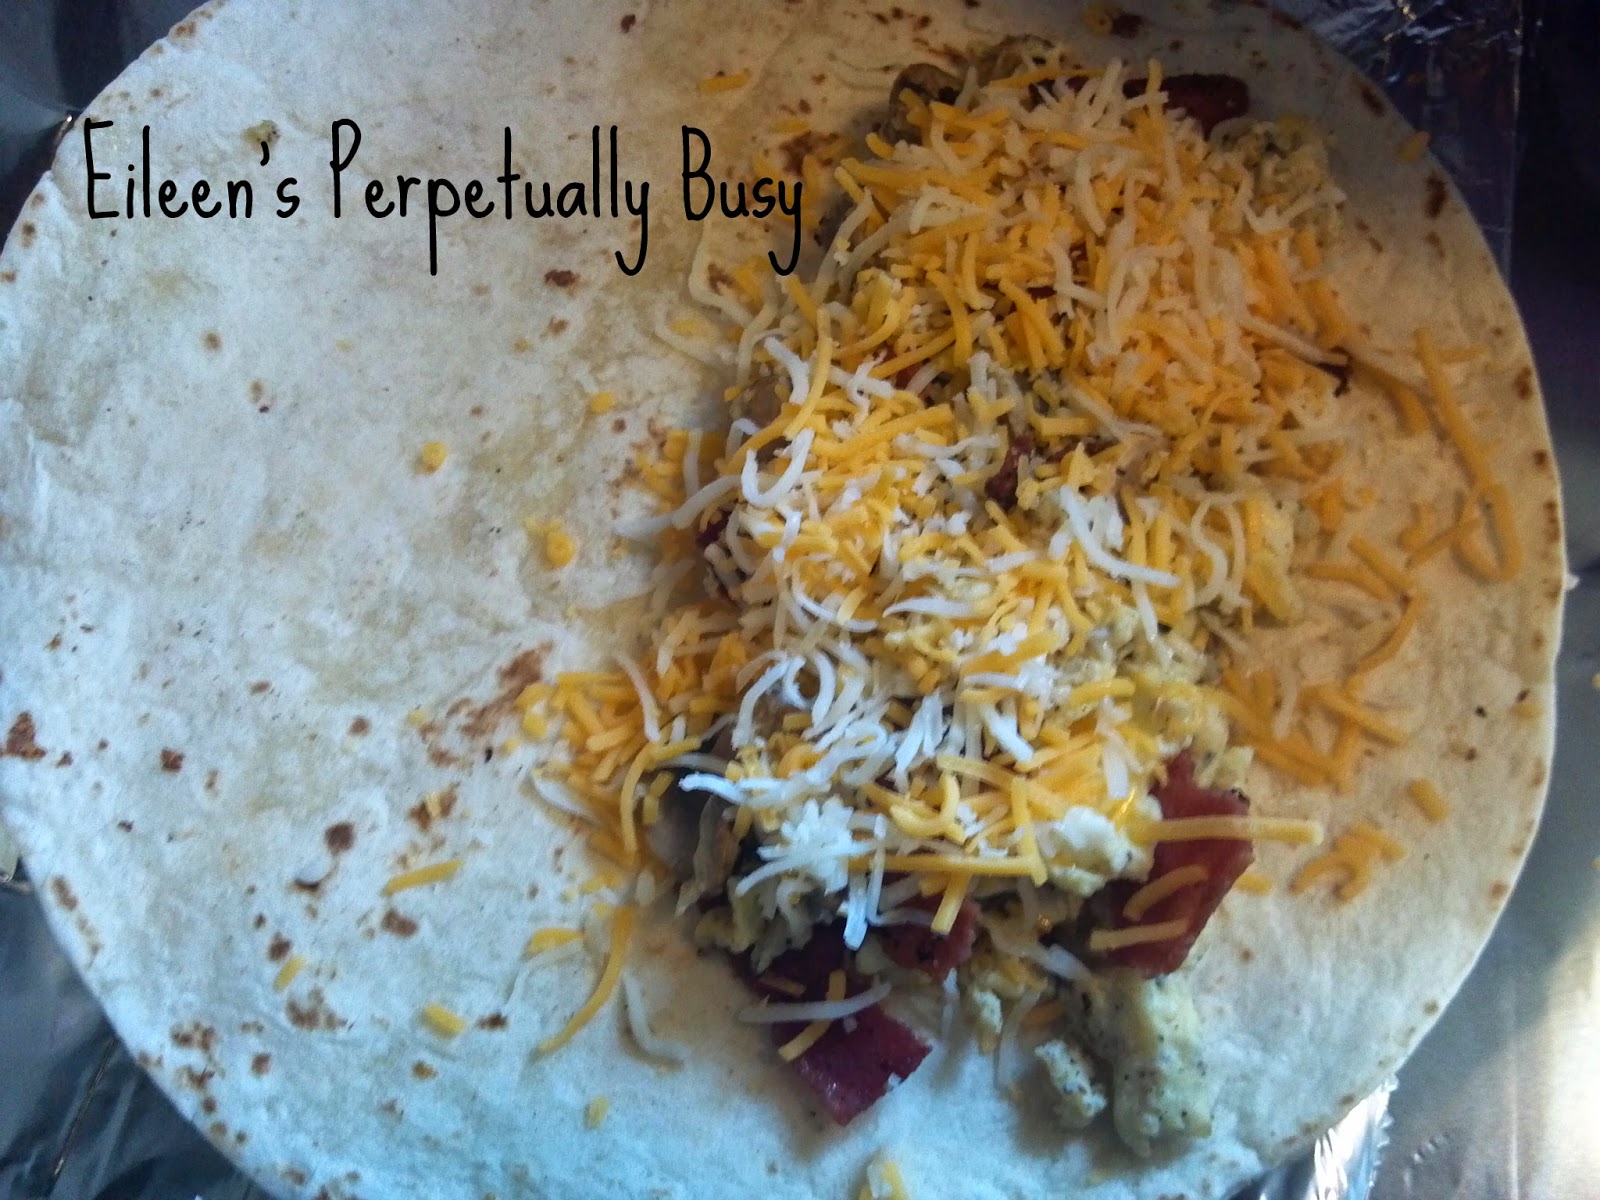
Trying It Out-Breakfast Burritos

A friend of mine referred me to a recipe at Southern Plate for Make Ahead Breakfast Burritos. It sounded good, but I was skeptical because I have never had a breakfast burrito...

I tried this recipe yesterday, but made some changes... I was working with what I had on hand.
  • 7 large soft taco shells (not as big as burrito)
  • 3 whole eggs
  • 4 egg whites
  • 1/4 cup milk
  • 1/2 package turkey bacon (or as Boo calls it, Fake-on)
  • 1 cup sliced fresh mushrooms
  • 3/4 cup shredded cheddar cheese
  • 1/2 cup shredded mozzarella cheese
Here are some images of my process:

Egg, bacon, mushroom mixture


Then, building the burrito:


And, my finished burritos... I ran out of foil.


Let me say, these things were great! I'm almost tempted to buy whole wheat tortillas to make them even healthier... I'd have to leave the mushrooms out in order to get Bob to eat them.

Saturday, February 2, 2013

Breakfast Ideas!

I'm am finding, as I get older, that I cannot eat sweet stuff for breakfast. I'm probably pre-diabetic. So, cereal, Pop-Tarts, Toaster Streudel, and all those other sweet things you can eat for breakfast need to be cut out of my diet.

So, I went in search of things I can make and reheat in the mornings:

Cheesy Ham and Hash brown Casserole was one of the first things I thought of, and I found a great recipe on Allrecipes.com (this could also be used for dinner!). The only problem is that it's not really a heat-and-go food. Meaning, I'd have to sit down with a fork and eat it. It's kinda hard to drive that way. Mondays and Wednesdays, I have to leave early for classes, I don't have time to do that.


Jimmy dean has a recipe using their Sausage Crumbles (which I'm sure you could make this recipe using any cooked and crumbled sausage) called Sausage and Egg Breakfast Cups which sound really simple and tasty!


I also found a Bacon Cheese Muffin recipe at Allrecipes.com. I imagine this one could be made using real bacon bits, instead of having to cook your own bacon (& bacon bits are cheaper and don't have as much fat attached to them).

Here's a recipe using crescent rolls at Cooks.com: Sausage Popovers

Loving the Little Things posted a recipe for bacon and cheese popovers, sounds really good! I couldn't see the images, though.

So, I think I have my arsenal ready... lots of different ideas for sugar-free breakfast, without trying to substitute the sugar in something.

Monday, January 28, 2013

Did you know Kool-Aid will go bad?

It never occurred to me that Kool-Aid would go bad. I mean, it's sugar, water, and flavoring... anyway, the kids like to mix flavors. Strawberry with lemonade, blue-raspberry with fruit punch, etc. They must not have liked the last mixture they made. I can't even tell you what it was because it was in the fridge for so long. They wouldn't drink it, but I kept leaving it in there trying to convey the message to drink it before they made more.

It sat in there so long that I finally decided to drink it myself, and I don't like Kool-Aid much because it gives me heartburn. Let me tell you, it was nasty! When I actually looked inside the pitcher, there was mold growing on the bottom, underneath the liquid!

Lesson learned, don't leave it in the fridge for weeks, it's better to just toss it if they don't drink it.

Our dog Milo won't come in the living-room because he doesn't like to walk on the new laminate flooring. He was doing fine for almost two months after we put it down. Then he started slipping and sliding on it for no apparent reason. My in-laws said that he might be having problems with his hips since he is a large-breed dog (black lab/rottweiler). We changed his food to one that contains glucosamine and he's making progress!

It started with him just putting his front paws on the floor, but leaving his back paws on more familiar flooring... he'll now come onto the new floor with all four paws, but JUST onto the floor, lol! He leaves himself so he can quickly scoot off of it if he wants too. He's so silly!

I have a lot of tutorials and stuff planned to do, but time hasn't been on my side. I started my fifth class of the semester on Friday, so my class work load is heavier. (I still don't quite understand why that class started three weeks after the other four.)

Stay tuned, I hope to get something interesting up this week, at least one thing, darn it, lol!

Thursday, January 24, 2013

Trying It Out- Oatmeal Muffins

I went in search of a really "breakfasty" muffin. I needed something I could grab and eat in the car. But not something totally unhealthy (like an Otis Spunkmyer muffin, or a handful of cookies).

I found a basic Oatmeal Muffin recipe at Allrecipes.com and doctored it:

Coffee Cake Oatmeal Muffins

Muffin ingredients:
  • 1/2 C milk
  • 1/2 C water
  • 1 C quick-cooking oats
  • 1/4 C packed brown sugar
  • 1 egg
  • 1/4 C vegetable oil
  • 1 C flour
  • 2 tsp. baking powder
  • 1/2 tsp. salt
Topping ingredients:
  • 1 C packed brown sugar
  • 1/2 C flour
  • 1/4 C butter or margarine
  • 1/2 C quick-cooking oats
Directions:
  1. Preheat oven to 425 degrees F. Grease a muffin pan or use baking cups. (12 muffins)
  2. Mix together milk, water, and oats. Let soak for 15 minutes.
  3. Mix together brown sugar, egg, and vegetable oil. Add oat mixture and blend well.
  4. In another bowl, combine flour, baking powder, and salt. Slowly add to wet ingredients until well mixed.
  5. Fill 12 muffin cups with this mixture and set aside.
  6. Mix together flour and sugar (from topping ingredients). Cut in butter or margarine until it resembles coarse crumbs. Add oats and blend well.
  7. Divide topping evenly over all 12 muffins.
  8. Bake for 18-20 minutes, until a toothpick in the center comes out clean.
Mine turned out a little dark, but that's easily rectified by cutting back how long you bake. I baked mine for 20 minutes.


I found these oatmeal muffins to be very bland, even with the topping. I started eating the tops first, then barely finishing the muffin itself. Honestly, I ended up throwing two away because no one else wanted to eat them. The blandness could probably be fixed by using more sugar, or adding cinnamon or something...

So, I tried again, this time adding more flavor to the muffins...

Strawberry-Banana (or whatever flavor you choose) Muffins
(In parentheses is what I used)
  • 1 cup milk (skim, lactose-free)
  • 3 packets instant oatmeal (1 strawberry, 2 banana, Quaker) [you can probably add a 4th packet for more flavor]
  • 1 egg (large)
  • 1/4 cup vegetable oil (canola)
  • 1 cup flour
  • 1/4 cup granulated sugar
  • 2 teaspoons baking powder
Directions:
  1. Preheat oven to 425 degrees, grease or line 12-muffin baking pan.
  2. Mix oatmeal and milk together. Add egg (slightly beaten), sugar, and vegetable oil.
  3. In a separate bowl, mix together flour and baking powder.
  4. Add dry ingredients to wet and mix well.
  5. Divide batter among 12-muffin pan.
  6. Bake for 16-20 minutes (18)
I skipped the salt in this recipe because there is salt in instant oatmeal, I believe.

The beauty of this recipe is that you can choose the flavor by using different flavors of instant oatmeal, and there are a lot of flavors to choose from! And, you don't have to soak your oatmeal for 15 minutes.

Believe it or not, these aren't too sweet and lightly flavored. They are very good, though! I won't get a sugar rush eating them, lol! And we may actually eat all 12 of them this  time!

The next thing to try is a cheesy muffin with either bacon or sausage in it... preferably an 'eggy' muffin, like a pop-over...

Thursday, January 17, 2013

Trying It Out- Lemon Bars!

My Better Homes and Gardens cookbook has a tasty recipe for Lemon Bars in it. And I love them, don't get me wrong, but the lemon portion of the recipe calls for 4 eggs. According to the serving size of 36 (36? Are they nuts? You'd get a bite sized piece if you cut it into 36 portions!) bars, there's 5 grams of fat in it.

Break that down to how many bars I usually cut it into, 15, and you get 12 grams of fat per bar. See?! They get you with those serving sizes! I'm not even going to figure out the calories and cholesterol. It's already high at 36.

So, I decided to see if I could make them a tiny bit healthier... the end result wasn't BAD, but it wasn't the SAME.

Here's how I made them:

Crust per Cookbook:
  • 2 Cups flour
  • 1/2 Cup powdered sugar
  • 2 Tablespoons corn starch
  • 1/4 teaspoon salt
  • 3/4 Cup butter (I used margarine)
Mix together dry ingredients, cut in butter with pastry blender (or forks work!). Press into greased 13X9X2 inch baking pan. Bake at 350 degrees for 18-20 minutes.

Since this wasn't going back into the oven with the lemon topping, I baked for 23 minutes, which turned out a little long.

Make sure to allow it to cool.

Then I mixed:
  • 1 pkg. Instant Lemon Jell-o Pudding
  • 1 Cup whole milk
  • 3/4 Cup water
The water was because all I had was whole milk and I was trying to cut some fat and calories from this. I suppose it would be better if I used 1 3/4 cups of skim milk.

Mix and beat or whisk for 2 minutes. Spread over top of "cookie" bottom. Chill for at least an hour and cut into 15 bars and serve.

Final analysis? It was good ( not as rich tasting), but wasn't worth the effort. The only thing this recipe did was bring down the amount of cholesterol in it (and if that is your goal then this recipe is for you!). The fat grams went from 12 per serving per the cookbook recipe, to 11.1 grams per serving using the pudding. Not to mention that the pudding was messier, or runnier you could say, than the original version of lemon bars.

  • Calories: 203
  • Calories from Fat: 100
  • Total Fat 11.1 g
  • Saturated Fat 1.8 g
  • Cholesterol 7 mg
  • Sodium 208 mg
  • Total Carbohydrates 20.3 g
  • Sugars 4.8 g
  • Protein 6 g


Oops, I forgot to include the tiny bit of powdered sugar I sprinkled on top!

Thursday, January 10, 2013

Easy Dinner Recipes

Since I've been sick since Sunday, I've been cooking easy meals. The less time on my feet, the better. I'll share them with you!

Easy Quesadillas
  • 2 cups cooked boneless chicken (or you can use left over taco meat, shrimp, sausage... whatever meat you want) I use left over rotisserie chicken
  • 1 cup cheddar cheese (or a Mexican or taco blend)
  • Taco sauce (or salsa if you prefer chunks)
  • 8 soft taco shells (or 4 burrito tortillas)
Preheat oven to 375 degrees.

Put one shell down on baking sheet, spread sauce, chicken, and cheese over top. Top with a second shell.

Bake for 10-15 minutes, until cheese is melted and chicken is heated through.

Let sit for a minute and cut into quarters. Serve with desired toppings (we use sour cream and taco sauce)


Slow-Cooked Vegetable Beef Soup
  • 1 lb. beef cut into cubes (you can also use venison)
  • 1 (15 oz.) can of tomato sauce (or use V-8 for extra flavor)
  • 2 cans diced potatoes, drained
  • 4-8 oz. frozen mixed vegetables (I use peas, corn, and green beans. Sometimes I find a bag with lima beans in it as well)
  • 1-2 Tbsp. Lawry's Seasoned Salt (depends on how spicy you want it)
Put beef, tomato sauce, and Lawry's Seasoned Salt into your crock pot. Cook on low for about 5 hours (or on high for 3 hours). Add drained potatoes and frozen mixed vegetables. Cook on high for another hour.

Serve with bread or rolls. Serves approximately 4-6 people.


Saturday, December 22, 2012

Easy Fudge Recipes

My friend Stacy (Stacy Sews and Schools) and I were talking on Wednesday about easy fudge recipes. She complained that she had never been able to make fudge the "old fashioned" way. I told her of two ways that I knew were easy and tasty.

So, I did a search for easy fudge recipes since all of mine are scattered here and there in my kitchen:)

Eagle Brand has quite a few that look good, here's the Eagle Brand Peanut Butter Fudge:


Ingredients
  • 1 (14 oz.) can Eagle Brand® Sweetened Condensed Milk
  • 1/2 cup Jif® Creamy Peanut Butter
  • 1 (12 oz.) package white chocolate morsels
  • 3/4 cup chopped peanuts
  • 1 teaspoon vanilla extract
Instructions

  1. LINE 8 or 9-inch square pan with foil, extending paper over edges of pan.

  2. HEAT sweetened condensed milk and peanut butter in large heavy saucepan over medium heat until just bubbly, stirring constantly. Remove from heat. Stir in white chocolate until smooth. Immediately stir in peanuts and vanilla.

  3. SPREAD evenly in prepared pan. Cool.

  4. CHILL, covered, 2 hours or until firm. Remove from pan by lifting edges of wax paper. Cut into squares.

Here is the easiest fudge I ever made found on Allrecipes.com:
Ingredients:
  • 3 cups semisweet chocolate chips
  • 1 (14 ounce) can sweetened condensed milk
  • 1/4 cup butter
  • 1 cup chopped walnuts (optional)
Directions:
  1. Place chocolate chips, sweetened condensed milk, and butter or margarine in large microwaveable bowl. Zap in microwave on medium until chips are melted, about 3-5 minute, stirring once or twice during cooking. Stir in nuts, if desired.
  2. Pour into well-greased 8x8-inch glass baking dish. Refrigerate until set.

And I've made this one before, very good! I found mine on a jar of Reese's Peanut Butter, I think:

Peanut Butter Fudge

Ingredients:
  • 1¼ cups (10 ounces) unsalted butter
  • 1¼ cups smooth peanut butter
  • Pinch of salt
  • 1½ teaspoons vanilla extract
  • 4½ cups powdered sugar, sifted
Directions:

1. Butter an 8-inch non-stick baking dish (or line with buttered parchment paper) and set aside.

2. In a medium saucepan over medium heat, heat the butter and peanut butter until the mixtures comes to a boil. Remove from the heat.

3. Add the salt and vanilla extract, then stir in the powdered sugar until smooth and no lumps remain.

4. Pour the fudge mixture into the prepared pan and smooth the top. Press a piece of plastic wrap directly on the fudge and refrigerate until set, at least 1 hour. Cut into squares and serve. Fudge can be stored at cool room temperature in an airtight container.

Enjoy Stacy (and anyone else wanting to try them)!