Come Tailgate With Us!

My project is a cushion with handles for carrying ease! This cushion would be useful in those uncomfortable stadium seats, on the bleachers, or on the back of a pick-up truck.
Below, I'll give you the links to the other 8 blog posts!
The team colors shown in this tutorial do not reflect Bob's favorite team, but this is the fabric that I had on hand. Stacy from Stacy Sews and Schools would probably love tohave this cushion to match her DIY Lap Rug or any of her other Steelers projects.
I originally planned for this cushion to be kind of hard, or stiff. I wanted it to at least be fully stuffed. I still may go back and resew some of the inside seams to make the cover tighter. However, by leaving it the way it is, it serves as a cushion and a pillow.
I didn't have to buy any of the materials for this cushion. I didn't use much fabric at all and I used an old pillow for the inside filling. I already had the ribbon from a prior project.
Materials:
1 old pillow
2 square pieces of fabric approximately 17" x 17"
4 pieces of fabric approximately 4 1/2" x 17" (you can make these thinner or thicker, depending on how thick you want the cushion)
Ribbon, or something like it for the handles
I started by cutting the pillow to a square size. I kept the remainder to make a small, decorative neck roll pillow. I washed this pillow before starting...you can't tell. Good thing I'm covering it up.


I then cut the pieces of fabric to the dimensions described above.

On one of the yellow pieces (side piece) I pinned an X of ribbon to create the handles. When I sew it together, the ribbon will get sewn into place.

I started sewing the yellow pieces to one of the black pieces. Basically the sides to the top piece, making sure to sew the right sides together.

Then I sewed the bottom piece onto the side pieces, making sure to keep the right sides together. I made sure to leave a hole in one section so I can get the pillow inside.

Then I sewed the corners shut.

Here it is before I put the cushion inside.

I slipped the cushion inside then carefully sewed the open seam together. This can be done one of two ways, you can use the machine, and have a noticeable seam, or you can hand sew it and maybe hide it a little better. I opted for the machine. I mean, you're going to sit on it; it doesn't really matter.

And here's the handy handle:

And the finished pillow:

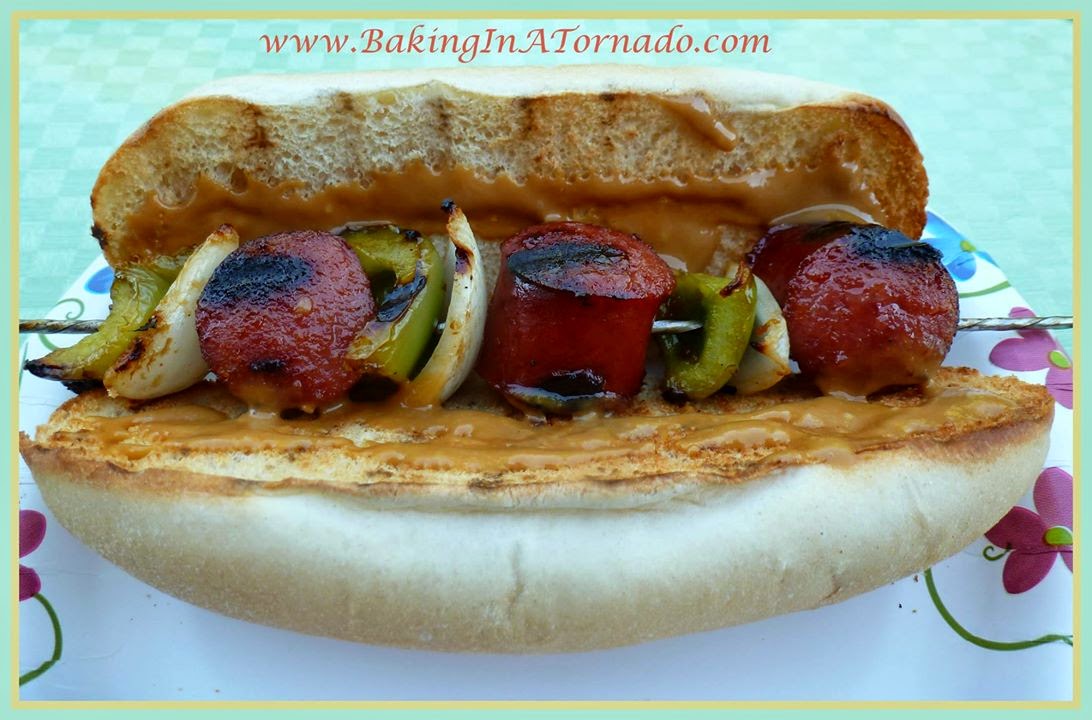
Karen at Baking in a Tornado has created a Glazed Kielbasa Sandwich; A recipe for Kielbasa and vegetables marinated, skewered, grilled and served on a roll.
Stacy at Stacy Sews and Schools has made Team Color Earmuffs; Sewn fleece headband/earmuff thingies in her favorite team colors.

Robin at Someone Else's Genius will be giving us an inside look at college football with her review of The System: The Glory and Scandal of Big-Time College Football.

Diane at Canning and Cooking at Home will be giving us a recipe for Spicy Mustard Relish; using up all your green garden tomatoes into a wonderful relish.

Shellybean at Follow Me Home has made Busy Bags; a step-by-step tutorial on making "to-do" bags for kids.

Lydia at Cluttered Genius has made an Easy DIY Upcycled Team Garland. Make a garland for your tailgate or mantel out of products you already have in your house!

Melissa at Home on Deranged is posting about Technology and Tailgating; use technology and cool gadgets to ensure you are master of tailgating time!

Shawn at Literary Litter has made a Snapcap, a crocheted hat to keep you warm and let everyone know what's on your mind.
